Tutorials/SCS Blender Tools/Staying Organized in Blender
The multi-model workflow with SCS Blender Tools is extraordinarily powerful. An entire, complex project may be easily managed from a single blend file: a truck with all of its accessories, interior variants, and animations; a trailer with all of its cargos; a system of wheel and tire accessories... A lot is possible with this workflow. However, without good organization and housekeeping, complex projects can quickly become cumbersome and difficult to navigate.
This tutorial provides some basic techniques for keeping blend files organized within the framework of the multi-model workflow.
Contents
Using Empty Objects
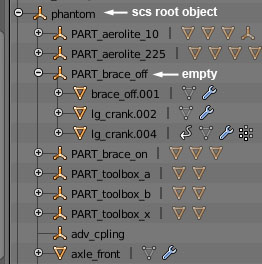
While arguably the simplest geometric object in Blender, the “empty” can be one of the most useful. Blender Tools makes use of the empty type for root objects and locators. When not configured as either or these special types, Blender Tools will not treat an empty specially upon export. To clarify, SCS objects which are children of an empty will still be treated as SCS objects; and, any objects which are children of an empty that is, in turn, a child of an SCS object will still be treated as belonging to the SCS object. The empty type can therefore be used to organize SCS objects within a scene, and any other objects within an SCS object, much like folders are used to organize documents.
Setting a Parent
Selected objects can be parented to the active object using the Ctrl+P shortcut. A context menu gives the option of keeping the current transformation or not. The keep current transformation option maintains the selected objects' absolute position, scale, and orientation in the scene, and is generally the preferred option in this case.
Clearing a Parent
Selected objects can also have their parents cleared, moving them to the root of the scene using Alt+P. This operation also has the option between keeping the current transformation or not.
Using Linked Duplicates
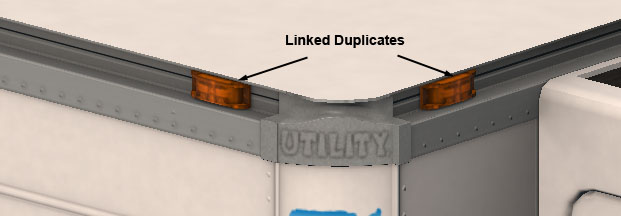
For repeated objects with non-uniform spacing, it is sometimes effective to make use of linked duplicates. When you duplicate an object using Alt+D, a new object is created with all of its data linking to the original. The new object can be moved, rotated and scaled using object transformations without affecting the original and can be given unique constraints and modifiers. Any changes you make to the mesh or vertex data in edit mode is applied to all copies.
An example where this is useful is trailer marker lights. All instances can be placed and rotated before the mesh, mapping (including lightmask), vertex colors, etc of the marker light are finalized. All of these data can be edited as needed and all of the instances are updated without needing to re-copy the original object. This makes it much simpler to prototype the entire trailer before getting bogged down modeling fine details.
Resolving Links
In some cases, you may wish to sever the link between duplicate objects. This can be accomplished with Object→Make Single User, hotkey U.


