| 1
|

|
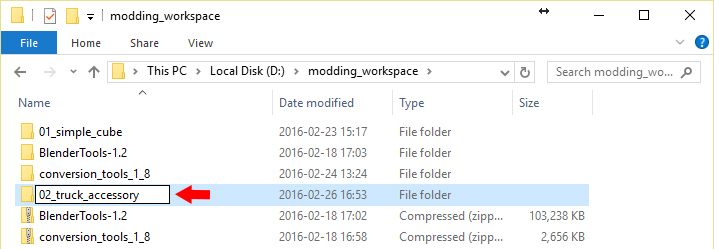
Create folder called 02_truck_accessory.
|
| 2
|

|
Inside 02_truck_accessory create folders:
- mod_accessory - where you will put the new resources
- base - for existing game resources which you will use
|
| 3
|

|
Inside mod_accessory create folders:
|
| 4
|

|
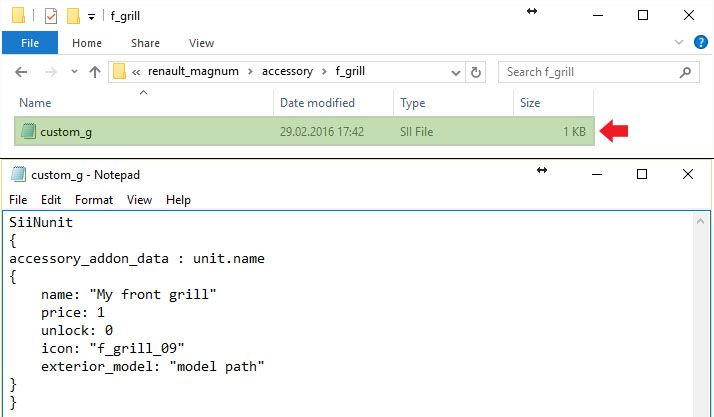
Inside /02_truck_accessory/mod_accessory/def/vehicle/truck/renault_magnum/accessory/f_grill create file called custom_g.sii which will contain definition of the grill.
And paste there the following example definition:
SiiNunit
{
accessory_addon_data : unit.name
{
    name: "My front grill"
    price: 1
    unlock: 0
    icon: "f_grill_09"
    exterior_model: "model path"
}
}
And keep the file opened.
|
| 4
|

|
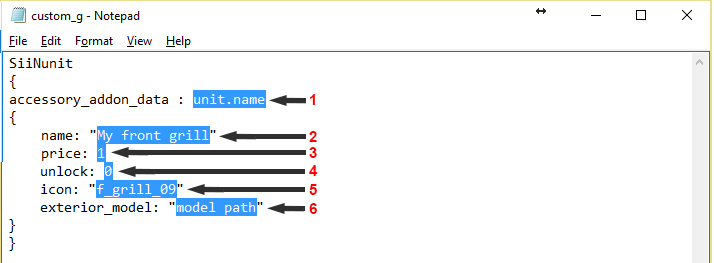
Now change definition as you want:
- "unit.name" must be set to some unique value - each component divided by dot can have max 12 characters. For example the good name will be custom.amazing.renault.f_grill
- The name is the name of the accessory in truck configuration screen. You can call it in any way.
- The price is a price of your accessory in game base currency (€ for ETS2, $ for ATS).
- The level when the accessory is unlocked. If zero it will be unlocked immediately on game start.
- The icon is a image that is displayed in truck configuration screen. We will leave the image at the moment as f_grill_09.
- The exterior_model is a model of the grill. It must a path to the .pmd file you will get after converting the data. So for this it will be: "/vehicle/truck/upgrade/frontgrill/renault_magnum_2009/custom_grill.pmd".
|
| 5
|

|
Inside mod_accessory create folders:
|
| 7
|

|
Inside the base folder create folders:
|
| 6
|

|
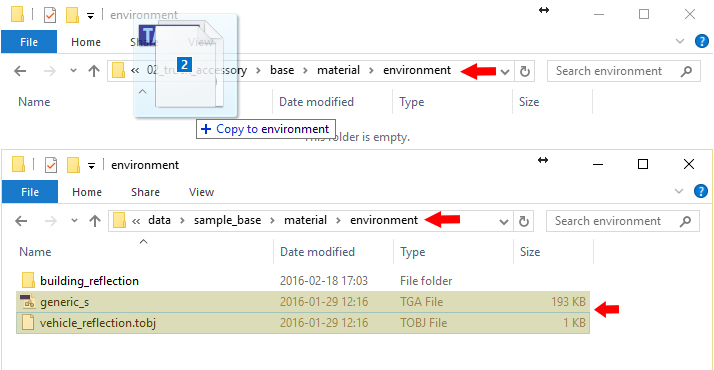
To the environment copy generic_s.tga and vehicle_reflection.tobj files from the BlenderTools-1.2\data\sample_base\material\environment folder which you can find in the folder where you extracted SCS Blender Tools.
|