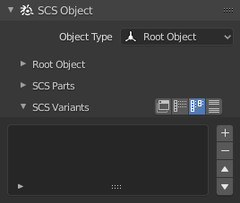
Variants are groups of Parts, which allows to set up a different variations of a game model. For example a truck model in its multiple variations, where different variants can use different cabins, chassis or spoilers. Variants provide a sufficient way how to set these “truck versions” in any combinations of the0 parts.
If you want to set Variants in your game model, you have to set some Parts and create a SCS Root Object (see Terminology and basics or Root objects). Then select SCS Root Object and go to Object tab of Blender properties window and inside SCS Object panel you'll find the SCS Variants sub-panel. Here you can find all the settings and tools for work with Variants.
Contents
Variant list
List of variants can contain no variant. The panel has buttons on right side to add/remove variants and arrow buttons for reordering. You can also double-click on any item in the list to rename it.
If there is at least one variant created, an Variant-Part Table is displayed under the list (or directly within the list in case of Integrated view style; see below). This Variant-Part Table always includes complete list of all parts, which are collected from all objects in current SCS Game Object. Here any part can be turned ON or OFF for an individual variant.
The variant list uses the standard Blender list mechanism, so you can use all the advantages of this system – filtering of items and custom sorting. Just click a small icon in lower left corner of the list to make these available.
Additional list tools
There are also an additional tools integrated for each item in variant list and can be used for easy selection/deselection (arrow icon) or hiding/showing (eye icon) of particular Variants. It works like a switches, so if it is pressed repeatedly it will select and deselect or hide and show all the Variant items. With ⇧ Shift pressed it will always add to the existing selection or always show the variant items and with Ctrl it will always subtract from existing selection or always hide the variant items.
View styles
You can choose among four view styles for the Variant-Part Table: Compact, Vertical, Horizontal and Integrated. The default one is Horizontal view style.
Compact View style
The only active variant in the list is displayed. This style is good if you have any amount of parts and variants and you'd like to view and edit a single variant at a time.
You can change display order of parts from unsorted (the order in which the items were created) to alphabetical using part alphabetical sorting button.
Vertical View style
All the variants are displayed vertically in a column. This style is good if you have large amount of variants and you'd like to go through them one after the other.
You can change display order of parts and/or pariants from unsorted (the order in which the items were created) to alphabetical using part or variants alphabetical sorting buttons respectively.
Horizontal View style
All the variants are displayed horizontally in a row with all its parts in columns. This style is good if you have rather smaller amount of variants and you'd like to view and edit them in a well-arranged table-like form.
You can change display order of parts and/or variants from unsorted (the order in which the items were created) to alphabetical using part or variants alphabetical sorting buttons respectively.
Integrated View style
In this view style there is no “Variant-Part Table” special area where all the parts are exposed, but instead they are displayed directly within the variant list. This style can be beneficial if you have small amount of parts and you'd like to view and edit them in a well-arranged table-like form with no additional UI clutter.
The Additional List Tools (see above) are in this case exposed just under the list box and they have effect always on selected item in the list.
