|
|
| Line 1: |
Line 1: |
| | + | {{TutorialNavigation|previous=Creating a Simple Road}} |
| | + | |
| | <big>Now that we have a basic understanding of how to connect roads and simple decorations for them. Lets focus on some advanced items using the <code>Road</code> item type.</big> | | <big>Now that we have a basic understanding of how to connect roads and simple decorations for them. Lets focus on some advanced items using the <code>Road</code> item type.</big> |
| | | | |
| Line 71: |
Line 73: |
| | | | |
| | |} | | |} |
| | + | {{TutorialNavigation|previous=Creating a Simple Road}} |
Revision as of 16:12, 19 April 2024
Now that we have a basic understanding of how to connect roads and simple decorations for them. Lets focus on some advanced items using the Road item type.
Bridges
| 1
|
|
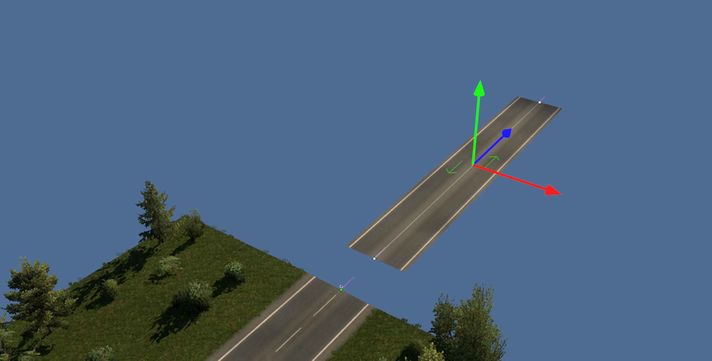
Using our example map, place a road and edit the properties to set the road look, variant, and set the terrain size to 0 meters
|
| 2
|
|
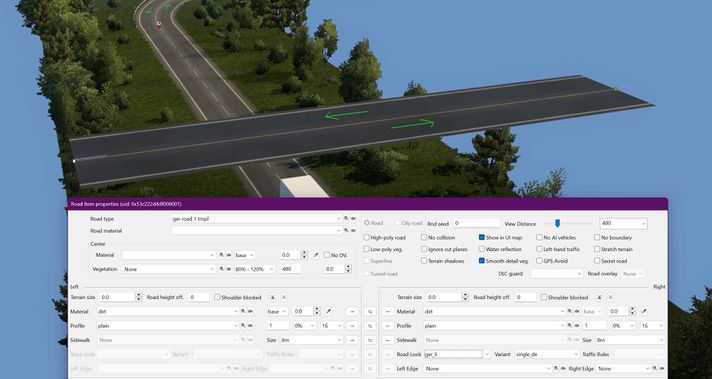
Go to railings tab, and pick a nice bridge model
- Here is what we are using:
/model2/railing/bridge/shared_simple.pmd
Take note of the road edge material and terrain material (these are necessary with most models to have nice looking edges)
|
| 3
|
|
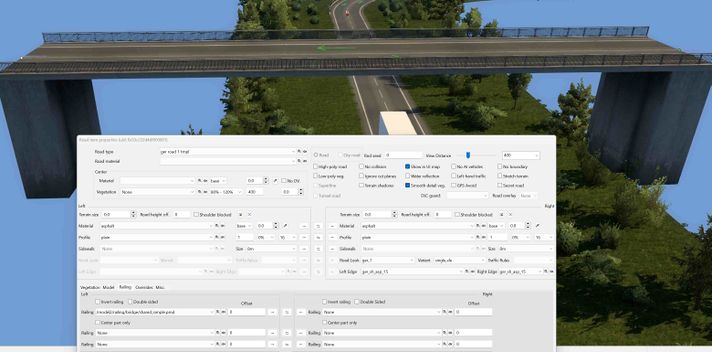
Allign your bridge to make it look nice and to fit with the area
TIP: You can use a marker model such as /model2/proxy_trailer_overweight.pmd to make sure your bridge is not too low to adjacent road pieces
|
| 4
|
|
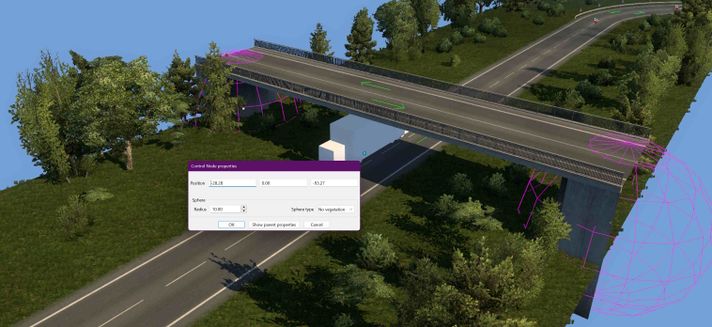
In our example, we have trees clipping through the bridge models.
- Go to the road item properties dialog box (of the problematic road piece's terrain) and click
Add veg. sphere.
- Modify the properties to adjust for size and position and set to
No Vegetation to clean up the area
|
| 5
|
|
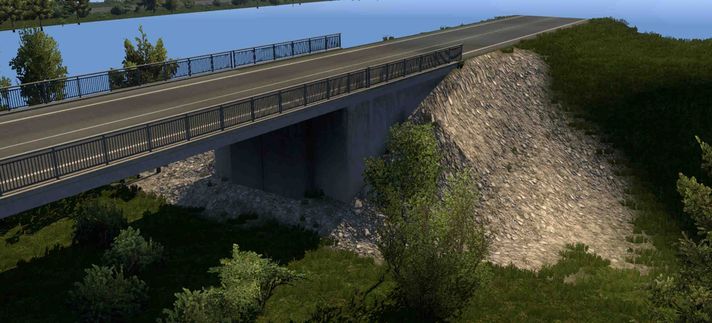
Use a few tools such as, brush and vertex tool to round off terrain into bridge models to develop the look you are going for
|
Tunnels
Tunnels are exactly like bridges, but in reverse and hopefully not floating in the sky!
| 1
|

|
Using our example map, place a road and edit the properties to set the road look, variant, and set the terrain size to 0 meters
|
| 2
|
|
Go to railings tab, and pick a nice tunnel model
- Here is what we are using:
/model2/railing/tunnel/tunnel_hw_2_lanes_one_way_it.pmd
|
| 3
|
|
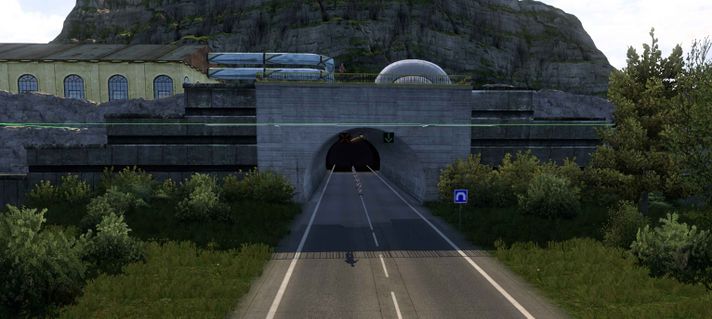
Use models, signs, building items and brushes to make your item fit with the area and look nice
|
| 4
|
|
Add a No weather area item and set for tunnel
- Fit the weather area to the tunnel
|


