Difference between revisions of "Tutorials/Map Editor/Roads/Road Item Default Properties Dialog"
< Tutorials | Map Editor | Roads
Jump to navigation
Jump to search
(Road Item default properties) |
(Pag links) |
||
| Line 1: | Line 1: | ||
| + | {{TutorialNavigation|next=Road Item Properties Dialog}} | ||
| + | |||
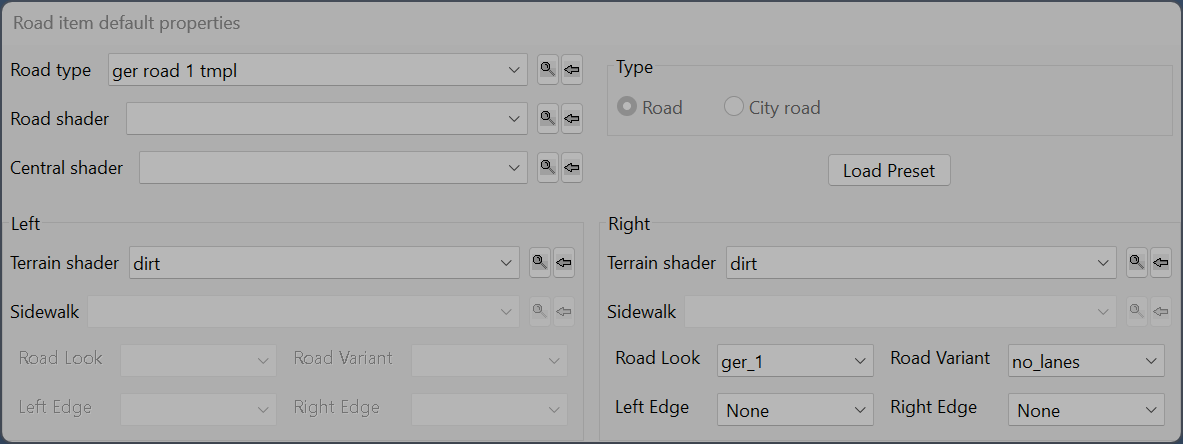
<big>When we select the <code>Road</code> Item type and then hit New Item (''E key''), we are greeted with the Road item default properties dialog box. This box is where we can set the default properties of our road piece.</big> | <big>When we select the <code>Road</code> Item type and then hit New Item (''E key''), we are greeted with the Road item default properties dialog box. This box is where we can set the default properties of our road piece.</big> | ||
<br> | <br> | ||
| Line 69: | Line 71: | ||
|} | |} | ||
|} | |} | ||
| + | <br> | ||
<br> | <br> | ||
<br> | <br> | ||
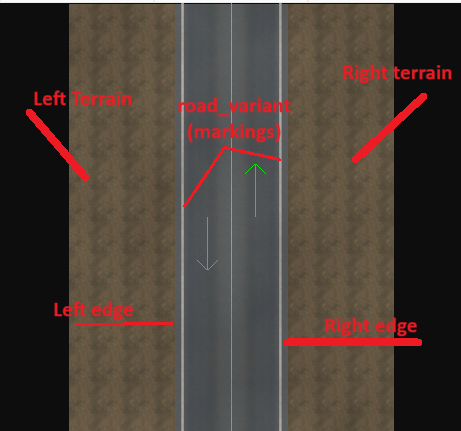
[[File:Ger 1 tmpl.png|frame|left|Only a few options are selectable]] | [[File:Ger 1 tmpl.png|frame|left|Only a few options are selectable]] | ||
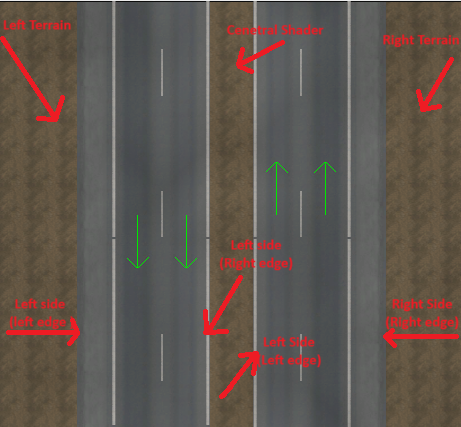
[[File:Ger hw 2 lanes 2m offset tmpl.png|frame|right|All options are available - note the central shader middle piece]] | [[File:Ger hw 2 lanes 2m offset tmpl.png|frame|right|All options are available - note the central shader middle piece]] | ||
| + | <br> | ||
| + | <br> | ||
| + | ---- | ||
| + | <br> | ||
| + | <br> | ||
| + | {{TutorialNavigation|next=Road Item Properties Dialog}} | ||
Revision as of 05:34, 17 April 2024
When we select the Road Item type and then hit New Item (E key), we are greeted with the Road item default properties dialog box. This box is where we can set the default properties of our road piece.
TIP: We can leave these settings as default and edit the road properties again later
|
|
|
|


